It's straightforward process. Estimated time to complete is 30 min.
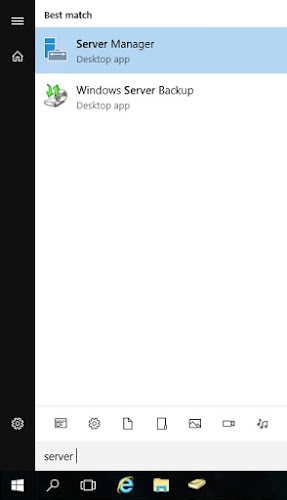
- Open up Server Manager - Click on Windows logo on taskbar and type server manager.
- Click on Manage and Add Roles and Features
- Click on Next >
- Select Role-based or feature-based installation and Next >
- Select Select a server from the server pool and select server name from the pool and Next >
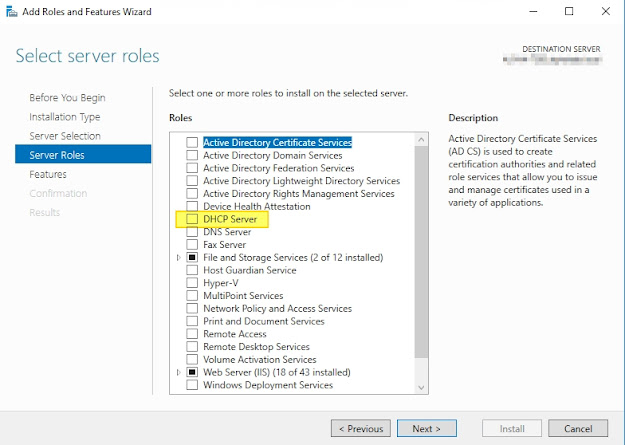
- Select DHCP Server and Next >
- Open up DHCP console - Click on Windows logo and type dhcpmgmt.msc
- From DHCP console expand up to IPv4.
- New Scope Wizard pops up and click on Next > button.
- Type in scope name and description.
- Type in your desired start and end IP address. In my example first IP address is 192.168.1.100 and last IP address is 192.168.1.200. Because this is class C IP range, leave subnet mask as default.
- You can add exclusions and delay. If a range of IP already used from above range you can exclude the range. For example 192.168.1.130, 192.168.1.131, 192.168.1.132 are already assigned to devices, you can set exclusion range with start IP address 192.168.1.130 and end IP address 192.168.1.132. A delay is mainly used for load balancing among DHCP servers but in this example we only have a DHCP server so leave it blank which is 0.
- Recommended lease duration for wired connection is 8 days. So we keep it as default. During 8 days client will keep same IP which assigned first time.
- We need to set DNS and gateway for DHCP clients. So select Yes, I want to configure these options now and click Next >.
- Your domain name and DNS servers are pre-defined from AD environment, leave as default unless you need to modify them.
- If you have WINS servers running, you can add server name or IP address. In this example I'll leave it blank.
- Now all basic configuration is done. We can activate the scope now. Click on Next >.
- New Scope Wizard is completed now by clicking Finish.
- Now we need to authorize this DHCP server in AD. Right click on server name from DHCP console and click on Authorize.
- Once it authorized and activated you will see green tick icon on IPv4 and IPv6 icons.
- Once it enabled, red down arrow will be disappeared. Right click on Allow again and click on New Filter...
- New Filter window pops up and you can type in MAC address and Description. Click Add button.
- Keep adding all computers' MAC address one by one. There is no import function for bulk upload.
Only computers in Allow list will gain IP address now.


COMMENTS